
Instructions
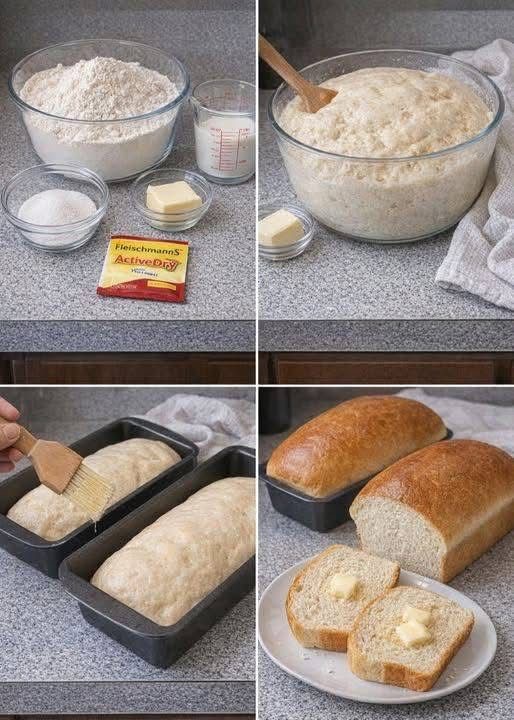
- Activate the Yeast: In a large mixing bowl, combine the warm milk and 1 tablespoon of the granulated sugar. Sprinkle the active dry yeast over the top. Stir gently and let it sit for 5-10 minutes, or until the mixture becomes foamy. This indicates the yeast is active and ready to go.
- Combine Dry Ingredients: In a separate large bowl, whisk together 5½ cups of the all-purpose flour and the salt.
- Mix the Dough: Add the remaining 1 tablespoon of granulated sugar and the melted and cooled butter to the activated yeast mixture. Stir well. Gradually add the flour mixture to the wet ingredients, mixing with a sturdy spoon or your hands until a shaggy dough forms.
- Knead the Dough: Turn the dough out onto a lightly floured surface. Knead for 8-10 minutes, or until the dough is smooth, elastic, and no longer sticky. If the dough is too sticky, add a very small amount of flour, a tablespoon at a time, until it reaches the right consistency. To test for proper kneading, perform the “windowpane test”: pinch off a small piece of dough and gently stretch it. If you can stretch it thin enough to see light through it without tearing, it’s ready.
- First Rise (Bulk Fermentation): Lightly grease a large bowl with butter or cooking spray. Place the kneaded dough in the bowl, turning it once to coat the top. Cover the bowl tightly with plastic wrap or a clean kitchen towel. Let the dough rise in a warm, draft-free place for 1 to 1½ hours, or until it has doubled in size.
- Prepare Loaf Pans: While the dough is rising, lightly grease two 9×5-inch loaf pans with butter or cooking spray.
- Shape the Loaves: Once the dough has doubled, gently punch it down to release the air. Turn the dough out onto a lightly floured surface and divide it into two equal portions. For each portion, flatten the dough into a rectangle (about 9×12 inches). Starting from one of the shorter ends, tightly roll the dough into a log. Pinch the seam closed along the bottom and tuck the ends under to create a neat loaf shape. Place each shaped dough log, seam-side down, into the prepared loaf pans.
- Second Rise (Proofing): Cover the loaf pans loosely with plastic wrap or a clean kitchen towel. Let the dough rise again in a warm, draft-free place for another 30-45 minutes, or until the dough has risen about 1 inch above the rim of the pans. While the dough is doing its second rise, preheat your oven to 375°F (190°C).
- Bake the Bread: Once the loaves have risen sufficiently, place them in the preheated oven. Bake for 30-35 minutes, or until the tops are golden brown and the internal temperature reaches 200-210°F (93-99°C) with an instant-read thermometer. For a softer crust, you can brush the tops with melted butter immediately after removing them from the oven.
- Cool Completely: Carefully remove the loaves from the oven. Let them cool in the pans for 5-10 minutes before transferring them to a wire rack to cool completely. Cooling completely is crucial for the internal structure and texture of the bread. Resist the urge to slice into them too soon!
ADVERTISEMENT
