
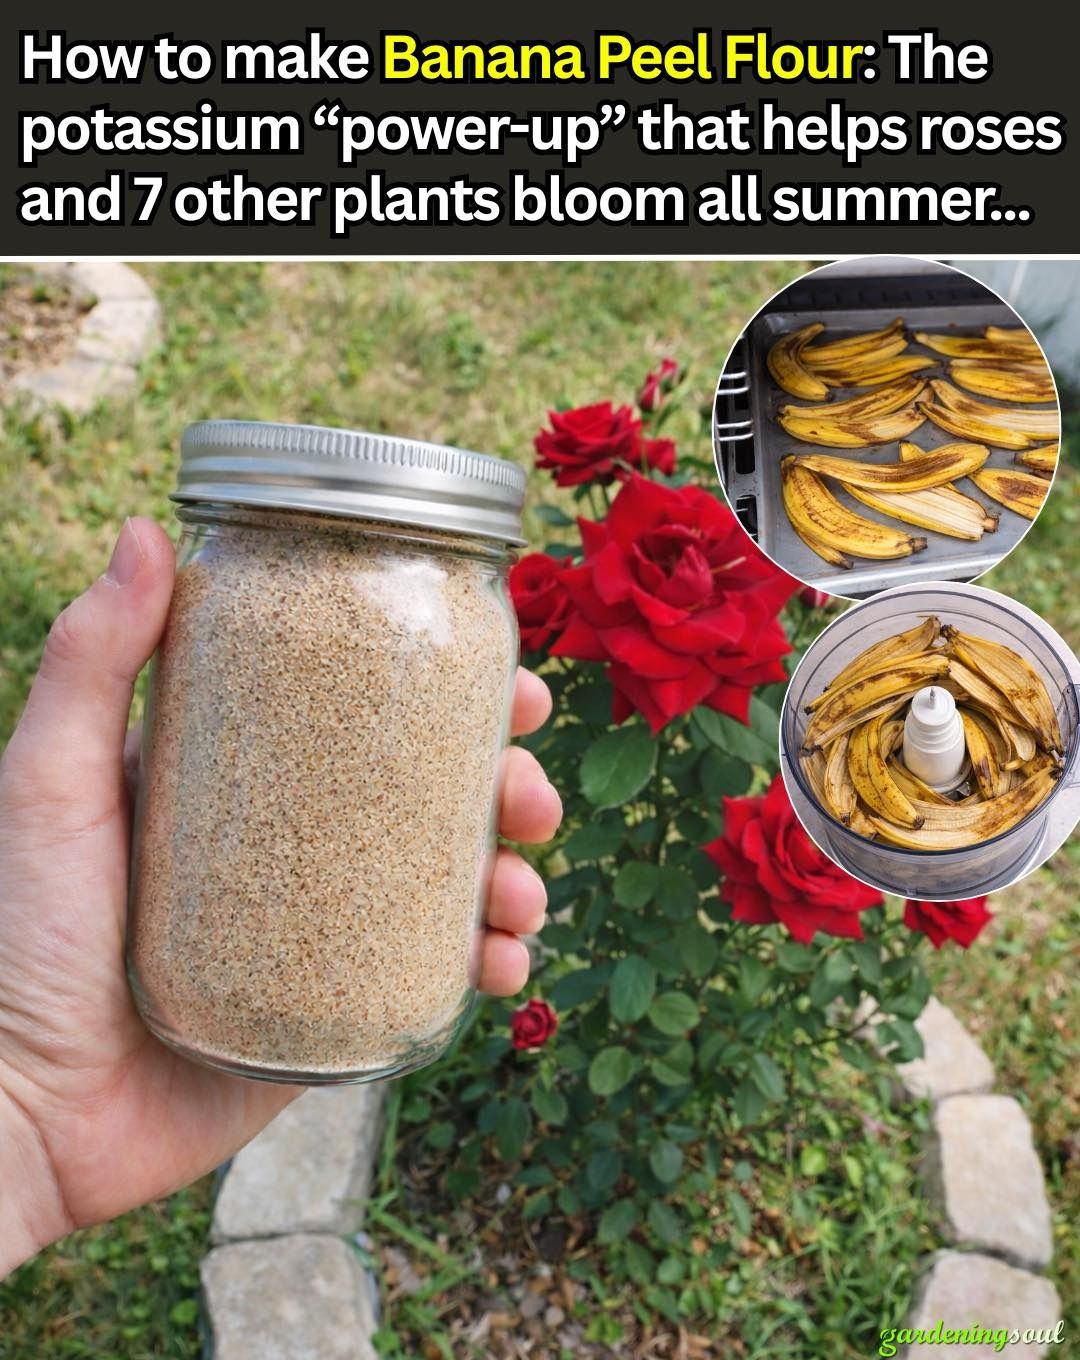
How to Make Banana Peel Flour (Step-by-Step)
Step 1: Collect peels the right way
Use peels from bananas you already eat. If you can, rinse them quickly to remove any sticky residue. (This also helps reduce potential surface contaminants.)
Step 2: Cut into strips for faster drying
Slice each peel into thin strips. Smaller pieces dry faster and more evenly.
Step 3: Dry completely (this is the most important step)
If peels are not fully dry, the flour can mold in storage and smell unpleasant in soil.
You have a few good options:
Air-drying: Lay strips on a rack or tray in a warm, airy spot. Turn occasionally. This can take several days.
Oven drying (most reliable): Spread strips on a baking sheet. Use a very low temperature and leave the door slightly cracked if possible. Dry until brittle.
Dehydrator (ideal): Dry until pieces snap easily.
Your goal is brittle, crisp peels-not leathery.
Step 4: Grind into a fine powder
Use a coffee grinder, blender, or food processor. Grind in small batches to get a finer texture.
If you want extra-fine flour, sift it through a strainer and regrind the larger bits.
Step 5: Store properly
Store in an airtight jar in a cool, dry place. Add a small food-safe moisture absorber if you live in a humid climate.
Properly dried flour can store for months.
How Banana Peel Flour Works in Soil
Banana peel flour does not act like a synthetic fertilizer that dissolves immediately. It must be processed by soil life.
Here’s what happens after application:
- Soil microbes begin breaking it down
- Nutrients become gradually available as decomposition progresses
- The release rate depends on temperature, moisture, and microbial activity
This means banana peel flour works best as a slow support, not a quick fix.
How to Apply Banana Peel Flour to Roses (Detailed)
see continuation on next page
ADVERTISEMENT
