
Step-by-Step Instructions
1. In a mixing bowl, combine creamy peanut butter, powdered sugar, melted butter, and vanilla extract. Mix until well combined and smooth.
2. Shape the peanut butter mixture into small balls and place them on a baking sheet lined with parchment paper.
3. Chill the peanut butter balls in the refrigerator for about 30 minutes to firm them up.
4. In a microwave-safe bowl, melt chocolate chips and vegetable shortening together until smooth, stirring at 30-second intervals.
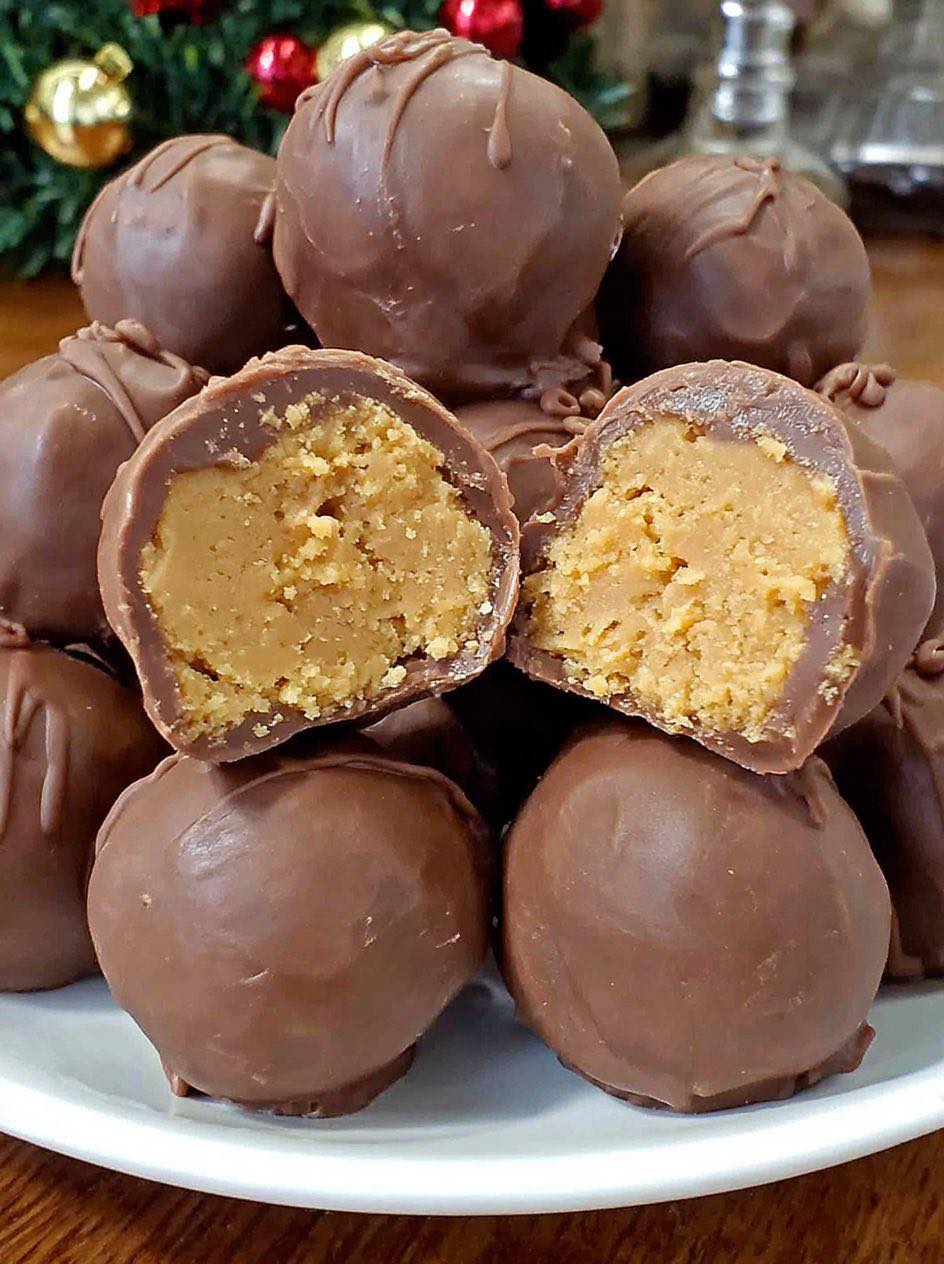
5. Using a fork, dip each peanut butter ball into the melted chocolate mixture, ensuring it is fully coated.
6. Place the coated balls back on the parchment paper and refrigerate until the chocolate sets.
7. Once the chocolate has hardened, your Butterfinger Balls are ready to be enjoyed!
Pro tip: To add a decorative touch, drizzle melted white chocolate over the hardened chocolate coating before serving.
Expert Tips for Success
For the best results when making Butterfinger Balls:
– Use high-quality chocolate chips for a rich and smooth coating.
– Ensure the peanut butter mixture is well chilled before dipping in chocolate to prevent it from melting too quickly.
– Experiment with different coatings such as crushed nuts or sprinkles for added texture and visual appeal.
– Store the Butterfinger Balls in an airtight container in the refrigerator to maintain their freshness and texture.
Avoid common pitfalls such as overheating the chocolate or allowing water to come into contact with it, as this can cause the chocolate to seize. By following these expert tips, you can create perfect Butterfinger Balls every time.
Variations and Substitutions
There are endless ways to customize your Butterfinger Balls to suit your preferences. Here are some creative variations you can try:
– Roll the peanut butter balls in crushed graham crackers for a s’mores-inspired twist.
– Add a pinch of sea salt to the peanut butter mixture for a sweet and salty flavor profile.
– Mix in mini marshmallows for a Rocky Road-inspired version of Butterfinger Balls.
– Substitute almond butter for peanut butter for a nutty and slightly different flavor profile.
Feel free to get creative with your ingredients and experiment with different flavors and textures to create a unique spin on this classic recipe. The possibilities are endless, so let your imagination run wild!
Serving Suggestions
When serving your Butterfinger Balls, consider pairing them with a glass of cold milk or a hot cup of coffee to enhance the flavor experience. These treats also make a delightful addition to dessert platters or gift baskets for special occasions.
For a fun twist, serve the Butterfinger Balls on a decorative platter with a dusting of powdered sugar or cocoa powder for an elegant presentation. You can also place them in colorful cupcake liners for a playful touch that will delight both kids and adults alike.
Whether you enjoy them as a standalone treat or incorporate them into a dessert spread, Butterfinger Balls are sure to be a crowd favorite that will leave everyone craving more.
FAQs
Q: Can I use natural peanut butter for this recipe?
A: While natural peanut butter can be used, keep in mind that it may alter the texture and flavor of the Butterfinger Balls slightly. For best results, stick to creamy peanut butter.
Q: How long do Butterfinger Balls last?
A: When stored in an airtight container in the refrigerator, Butterfinger Balls can last up to two weeks. However, they are best enjoyed within the first week for optimal freshness.
Q: Can I freeze Butterfinger Balls?
A: Yes, you can freeze Butterfinger Balls for up to 3 months. Thaw them in the refrigerator before serving for the best texture.
By addressing these frequently asked questions, you can ensure that your Butterfinger Balls turn out perfectly each time and address any concerns your readers may have when attempting the recipe.
Final Thoughts
As you come to the end of this culinary journey into the world of Butterfinger Balls, we hope you feel inspired to create these delectable treats in your own kitchen. Whether you’re a seasoned baker or a novice cook, this recipe offers a fun and rewarding experience that will result in a delicious sweet treat.
Share your Butterfinger Balls with loved ones, bring them to gatherings, or simply indulge in them as a special treat for yourself. The joy of creating something homemade and delicious is unmatched, and these Butterfinger Balls are sure to bring a smile to anyone who tries them.
So, gather your ingredients, follow the step-by-step instructions, and let the magic of Butterfinger Balls unfold in your kitchen. Here’s to creating sweet memories and savoring every bite of these irresistible confections. Enjoy!
ADVERTISEMENT
